
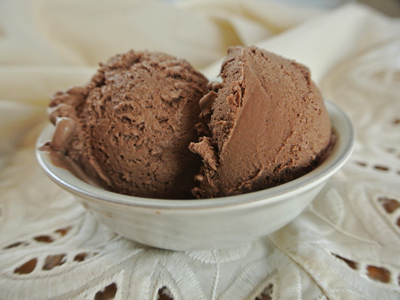
This became my indulgence over the summer, home made ice cream! I’ve never been one to eat ice cream by itself, but rather alongside cake or pie, that is until I started making my own. This summer I made so many quarts of ice cream I can hardly count, but one of my favorites was this dark rich chocolate ice cream. I love the pure chocolate taste which is creamy and melts in your mouth like smooth pudding. I found this ice cream stands on it’s own and you won’t need anything else to satisfy those chocolate cravings.
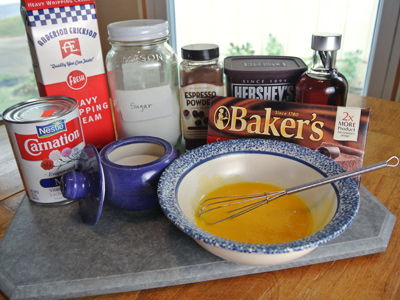
The ingredients include a can of evaporated milk, heavy cream, sugar, dark baking chocolate, unsweetened cocoa powder, espresso powder, egg yolks, salt and vanilla. Also you’ll need a bit of boiling water.

Set up a double boiler by placing a bowl inside a saucepan with boiling water, leaving a bit of room between the water and the bowl. Add 4 ounces of semi sweet or 60% baking chocolate.
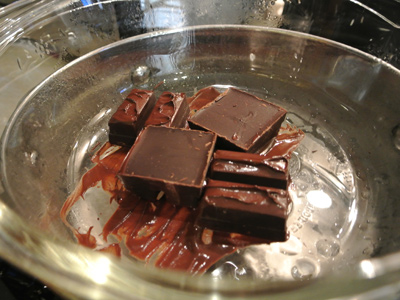
Begin to stir as the chocolate starts to melt.

Continue to stir until it is completely melted.
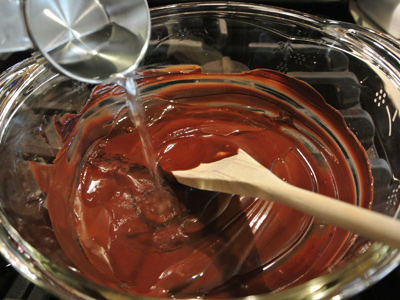
When the chocolate bars have all melted, add in 1/4 cup of boiling water and continue to stir.

Stir vigorously to avoid any lumps.

Transfer the chocolate to a heavy bottomed saucepan and add in the cocoa powder and half of the sugar. Again, stir vigorously.
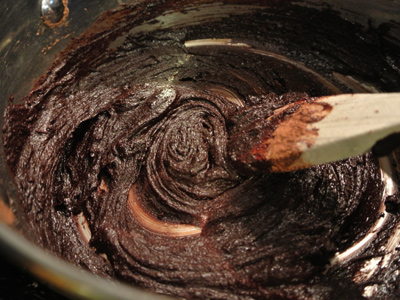
It takes a minute or two of continuous stirring but it comes together in a dark thick chocolate mix.
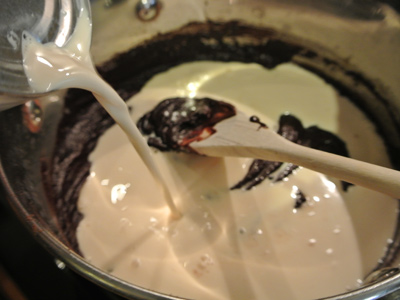
Return the saucepan to medium heat and stir in the evaporated milk and remaining sugar. You can use whole milk, I use evaporated milk because my Mom always used it. To this day she still uses canned milk.
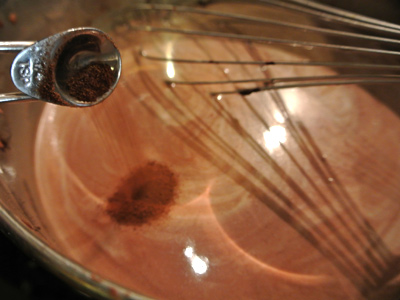
I found I needed a whisk once I started adding the wet ingredients. When it starts to smooth out, add in the espresso powder.

And salt.

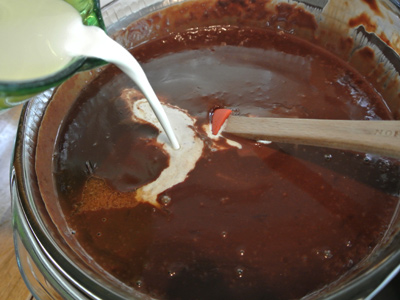
And 1 cup of the heavy cream. Whisk to incorporate and when the chocolate base is fully mixed crank up the heat just enough to steam.
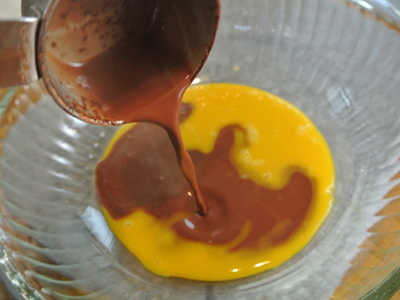
In a medium bowl temper your whisked egg yolks by pouring a cup at a time of the chocolate base into the eggs stirring vigorously to prevent them from cooking.

Once you have about half of the chocolate mixed in with the eggs, transfer back to the saucepan and heat again over medium heat and begin stirring again until the mixture starts to thicken.
Make an ice bath by placing some ice in a large metal bowl beneath a glass bowl. Strain the thickened chocolate base into the glass bowl to strain out any lumps. Add in the remaining cup of heavy cream and stir.
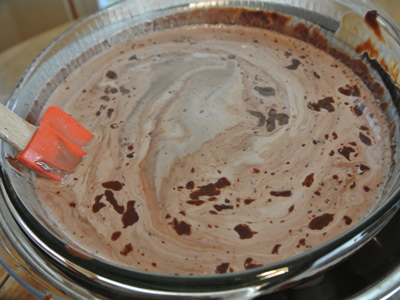
It takes a minute or two while the mixture begins to cool and for the cream to fully incorporate into the chocolate base.

Last step, add in a teaspoon of vanilla. Once this is stirred in, place a lid or plastic wrap over the bowl and refrigerate several hours or overnight.
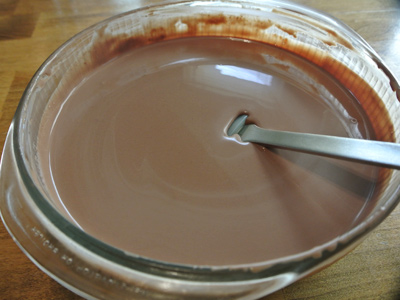
This was in the fridge overnight and it has the texture of velvety smooth pudding. Pour this mixture into your ice cream maker and freeze according to manufacturers instructions.

This is only my experience, but it seems like the longer you chill the ice cream base the faster it churns into ice cream. This took only a few minutes and it was ready to transport to the freezer. If you like soft serve, this is perfect.
Rich Chocolate Ice Cream (adapted from Simply Recipes; Chocolate Ice Cream)
4 ounces Semi Sweet or 60% Baking Chocolate
1/4 cup Boiling Water
1/3 cup Unsweetened Cocoa Powder
1/2 Cup Sugar
1 can Evaporated Milk or 2 cups Whole Milk
2 cups Heavy Cream
Pinch of Salt
1/4 teaspoon Espresso Powder
3 Egg Yolks, whisked
1 teaspoon Vanilla
Set up a double boiler by placing a bowl over a saucepan of boiling water, leaving room between the water and the bottom of the bowl. Melt the baking chocolate in the bowl, stirring until it completely melts. Remove from heat and add in the boiling water, stirring vigorously to avoid any lumps. Add the cocoa powder and half of the sugar and continue to stir as the base becomes very thick.
Transfer the chocolate base into a heavy bottomed saucepan over medium heat and whisk in the evaporated milk, remaining sugar, espresso powder, salt and 1 cup of the heavy cream. Whisk together until fully incorporated and heat just to steaming. Remove from heat.
Whisk the egg yolks and place in a medium glass bowl and slowly pour in some of the chocolate base (about a cup at a time) into the eggs, stirring continuously to prevent cooking the eggs. When you have incorporated about half of the chocolate mixture, pour the egg mixture back into the saucepan with the rest of the chocolate base and back to the stove over medium heat. Bring the mixture back just to steaming. It should be thick enough to coat the back of a spatula. Remove from heat.
Set up an ice bath by placing a glass bowl inside a larger bowl filled with ice. Strain the chocolate mixture into the bowl to strain out any solids or lumps. Pour in the remaining cup of heavy cream and stir to incorporate. Stir in the vanilla. Place a lid or plastic wrap over the bowl and refrigerate 4 hours or overnight.
Once completely chilled, pour the chocolate base into your ice cream maker and freeze according to manufacturer instructions. Once churned place in the freezer until ready to eat. Ice cream will become hard to scoop if left in freezer for long, Set out for a few minutes before scooping.
Makes about 1 quart.

2 thoughts on “Rich Chocolate Ice Cream”
Anne ~ Uni Homemaker
I love chocolate ice cream! And homemade ones must be fabulous!
LikeLike
NativeNM
Thanks, I’m definitely a fan of making homemade ice cream. And who could resist chocolate!
LikeLike