

It seems like dried fruit is always front and center this time of year. I enjoy most dried fruits but dates aren’t necessarily one of them. However, they are one of Joe’s favorites and he loves date bars so I thought I would give them a try. He described a soft chewy bar with a bottom crust and date filling, topped with a crumbly streusel. They must have turned out pretty good because he grabbed a bar every time he walked by and gave me a thumbs up with a smile!

Chop 3 cups of pitted dates.

Pour the chopped dates into a 3 quart saucepan over medium high heat.

Add 3/4 cup of water and 3 teaspoons of vanilla. Let that come just to a boil then turn the heat down to low and let simmer covered for about 15 minutes. Allow the dates to cook down, stirring the pot every few minutes. After the 15 minutes they should be soft and turn into a thick paste when stirred. Remove from heat and let cool.
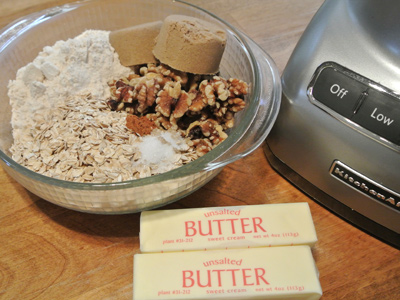
The bottom and top crust are the same, just one part packed on the bottom and the top crumbled to make a streusel like topping. You’ll need flour, oats, walnuts, brown sugar, salt, cinnamon and 2 sticks of butter to get started.

Pour the dry ingredients into a food processor and pulse a few times to grind up the walnuts and mix everything together.

Cut the butter into pieces and add to the dry mix. Pulse a few times until the mixture becomes crumbly and the butter pieces are no larger than pea size.
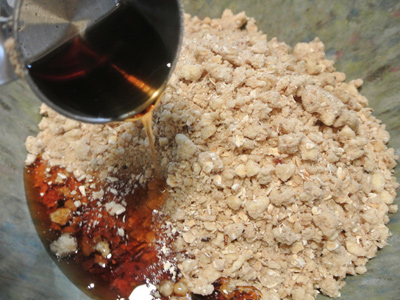
Transfer the mix into a larger bowl and add 1/3 cup of agave nectar to add some sweetness and bind it together.

One last dry ingredient . . . some rice cereal adds a little bit more crunch and flavor to the mix.
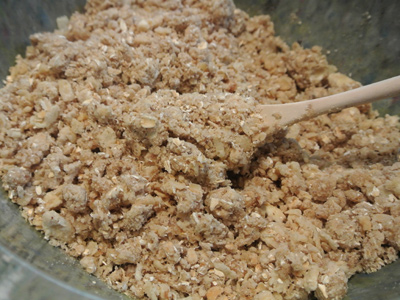
Fold the rice in so that it is mixed in but not crushed.

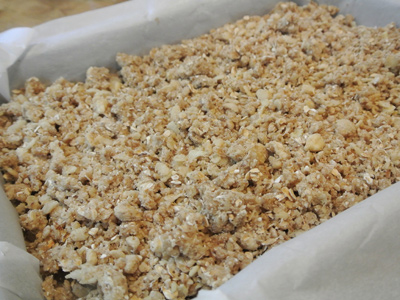
Reserve 2 cups of the bar mix and press the remaining mix into a 9 X 11 inch pan. To make cleanup easier, line the pan with some parchment paper first.

Press it in with your fingers until it’s level and about 1/2 inch thick.
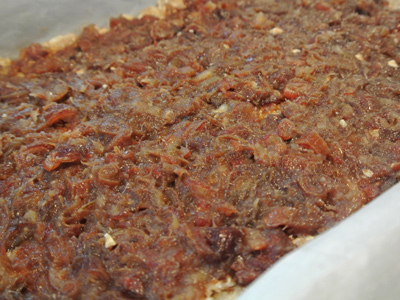
The dates should be cooled by now. Spread the pasty mixture over the crust leaving just a small line around the edge clean.
Sprinkle the reserved 2 cups of crumbly topping over the date mixture and pop into a 350 degree oven for 25 – 30 minutes.
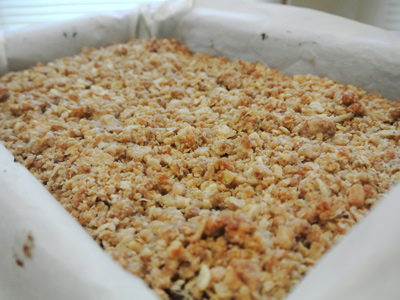
Remove when the topping has browned. This was in for exactly 30 minutes.

Let the pan cool completely, then lift the parchment paper out of the pan and cut into bars with a sharp long bladed knife.
Date Bars
3 cups Pitted Dates, chopped
3/4 cup Water
3 teaspoons Vanilla
1 3/4 cup Flour
1 1/2 cups Oats
1 cup Walnuts
2/3 cups Brown Sugar
1 teaspoon Salt
1/4 teaspoon Cinnamon
1 cup Unsalted Butter, cold
1/3 cup Agave Nectar
3/4 cup Rice Cereal
To make the date paste: Chop the dates and add to a 3 quart saucepan. Over medium high heat, add the water and vanilla and bring just to a boil. Turn the heat down to low, cover with a lid and let simmer for 15 minutes. The dates, when stirred should look like a thick paste. Remove from heat and let cool.
To make the top and bottom crust: Combine flour, oats, walnuts, brown sugar, salt and cinnamon in a food processor. Pulse several times until evenly combined. Add the softened butter and pulse until the mixture becomes crumbly with the butter pieces no large than pea size. Transfer mixtue to a large bowl and drizzle agave nectar over top. Use a spatula or wooden spoon to work the mixture together, then gently fold in the rice cereal. Set aside 2 cups for the topping.
Preheat oven to 350 degrees. Line a cake pan with parchment paper so that it rides up the sides of the pan and can be lifted out after baking. Take the mixture for the bottom crust and pour into the lined pan. Press it into the pan with your fingers pressing into the corners and making it level across the top and sides, about 1/2 inch thick. Next, spread the pasty date mixture over the crust leaving just a small line around the edge clean. Sprinkle the reserved topping over the date mixture and place into the oven for 25 – 30 minutes or until the topping has sufficiently browned.
Let the pan cool completely, then gently lift the parchment paper out of the pan onto a cutting board. Slice into bars. Store in airtight container.
Makes approximately 30 bars.

2 thoughts on “Date Bars”
Karen
One of my favorite dried fruit bars is made with apricots but your bars certainly do look good.
LikeLike
NativeNM
Thanks, Karen! If it were me, I would go with the apricot bars over dates. I am really not a “date” person, but my hubby loves them and they were a real treat for him!
LikeLike