
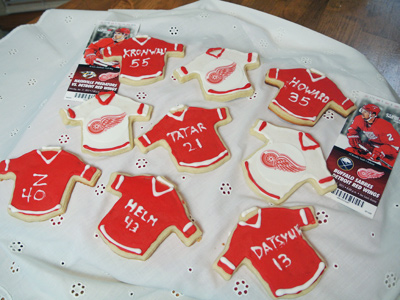
Hockey season is back! Finally. . . after a long summer break, the Wings are about the hit the ice for another year of Red Wings Hockey. I can’t wait until tonight when they open the season full of excitement and high expectations for a successful season. For 23 years straight my Red Wings have made the playoffs, gone to the finals 6 times and won the Stanley Cup 4 times in 17 years. Last year I watched HBO’s 24/7 which featured behind the scenes with the Red Wings organization and players leading up to the outdoor Winter Classic on New Years Day. There was a scene where the Wings were flying to a road game and while on the plane the guys were served sugar cookies with their jersey names and numbers. They were so COOL!! I searched online and found a jersey cookie cutter then sent off for some winged wheel edible icing images to decorate the white jerseys. I used icing tips to write their name and numbers on the home red jerseys. They were so much fun to make, a lot of work but worth every minute. I’m especially looking forward to this season because we are flying to Detroit in January to see the Wings play at Joe Louis Arena!! I can’t wait!

First get started with the cookie dough. In a mixing bowl, add 1 cup butter and 1 cup sugar.
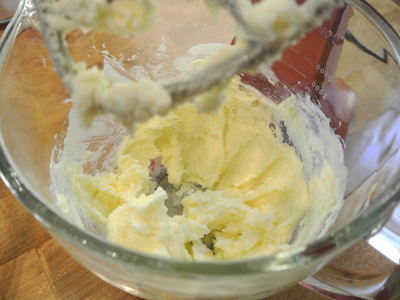
Beat on low while the butter and sugar cream together.

Add in an egg and beat some more.

Combine flour and baking powder together, then add a little at a time until all the dry ingredients are combined.

The dough should be stiff which will make it easier to handle.
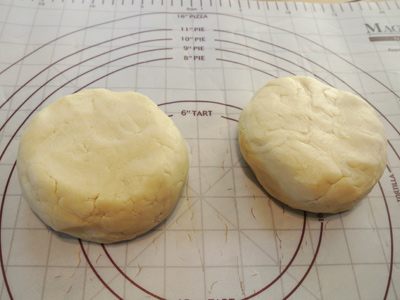
Turn out the dough on a work surface, knead together, then divide and shape into 2 discs.
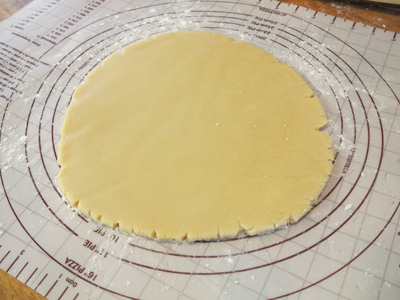
Sprinkle flour on your work surface and roll out dough to about 1/4 inch thickness.
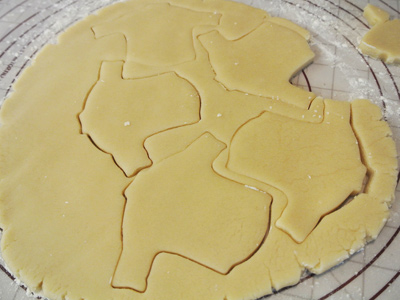
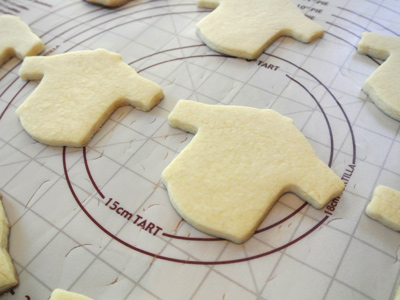
Use your cookie cutter to cut out your shapes. Any remaining dough can be kneaded and rolled out to make additional cuts.
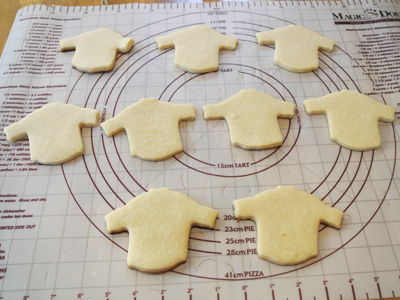
Here’s the first first batch, now it’s time to roll out the rest.

This is my first time to bake cookies on a silicone mat. It worked great btw. Bake at 350 degrees for 8 – 9 minutes.

While the cookies are baking I’m going to whip up some royal icing. In a mixing bowl, add 4 cups of powdered sugar and 3 tablespoons of meringue powder. You can find this anywhere Wilton products are sold.
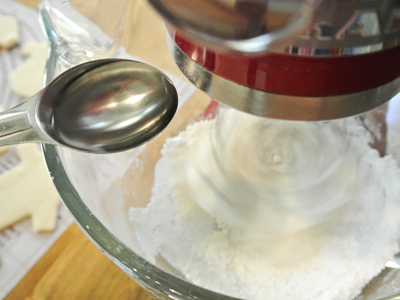
Begin mixing on low and add 5 tablespoons of water.

Continue mixing for 7 – 10 minutes. For the first stage you want the icing to be thick enough to pipe the outline of your cookies. Some of the icing will be thinned later to flood the cookies. If the icing is too thick to pipe easily, add a little bit of water, 1 teaspoon at a time until you have the right consistency.
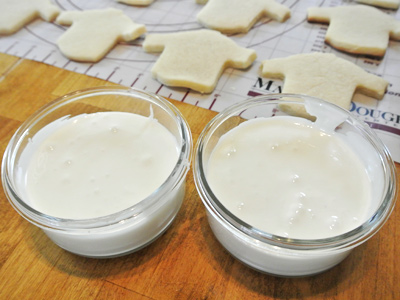
Divide the icing by how many colors you are using. I only need white and red icing so I divided the icing into 2 containers.

I added red food coloring to one of the bowls of icing.
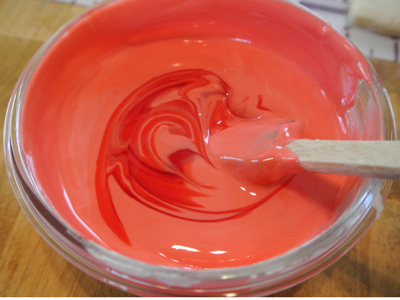
Add a little bit of coloring at a time, stirring after each addition until you have the desired shade for your cookies. I added almost 2/3 of the bottle to get the desired red coloring I needed for these cookies. Once you have your colors mixed, set aside part of the icing to be used to flood the cookies. I estimated that I could get by with half the icing for flooding and half for piping the outline and tracing the letters and numbers. You should use your own judgement based on how many colors and how much you will need for flooding and decoration.
The cookies have baked and cooled completely, it’s time to start the outline.

You will want to outline the cookies with whatever color you plan to flood the cookies with. You can go with a pastry bag and small tip or you can use a squeeze bottle. I tried both methods and found that I had more control with the squeeze bottle. I think it’s purely an individual preference so go with whatever works best for you.

I finished the white outline first then outlined the red jerseys. You want the outline to be completely dry before adding the thinned flood icing.

Fill each cookie with the thinned icing and let dry.

Time to take a break while the icing dries. Save any leftover thinned icing just in case. You can always thicken it if you run low when decorating your cookies.

The next step is to pipe the trim around the jerseys.

I piped the letters and numbers on the red jerseys. I used a pastry bag and #3 tip because it was smaller than the tip on the squeeze bottle. The winged wheel edible images went on very easy. I used a small clean paint brush to brush a tiny bit of water over the area where the image was to be applied. Then removed the image from the backing paper and gently placed on the cookie.
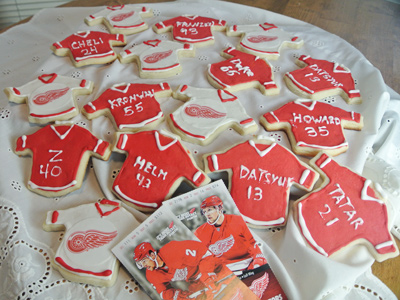
GO WINGS!!
Sugar Cookies (adapted from In Katarina’s Kitchen)
1 cup Butter, softened
1 cup Sugar
1 teaspoon Vanilla
1 Egg
2 teaspoons Baking Powder
3 cups Flour
Preheat oven to 350 degrees. In the bowl of a stand mixer, cream together softened butter and sugar. Beat in vanilla and egg until well combined.
In another bowl mix together the flour and baking powder. Begin to add the dry ingredients into the creamed mixture a little at a time, beating after each addition. The dough should be very stiff and be easy to turn out onto a work surface. Knead the dough and divide in two. Knead each half into a round disc.
Roll dough out onto a floured surface to about 1/4 inch thick. Use cookie cutter to cut out shapes. Any leftover dough can be saved, kneaded and rolled out to make additional cookies.
Place cutout cookies on a baking sheet and bake for 8 – 9 minutes. Let cookies cool on baking sheet for a couple minutes then transfer to a cooling rack. Let cookies cool completely before applying icing.
Made 24 cookies **amount of cookies will vary depending on size of cutout
Royal Icing (from Wilton.com)
4 cups Powdered Sugar
3 tablespoons Meringue Powder
5 tablespoons Water
Food Coloring
Mix the powdered sugar and meringue powder in a mixing bowl. Begin adding the water 1 tablespoon at a time and beat on low for 7 – 10 minutes. The icing should be thick enough to outline cookies. Divide your icing into how many containers you will need colors for. Keep in mind how much you will need for decorating (thicker icing) and how much you will need for flooding (thinner icing). Add any food coloring that you will need for decorating your cookies and set aside. Pipe the outline icing into a pastry bag with a small tip or use a squeeze bottle to outline each cookie. Let the icing dry before flooding the cookies.
Thin icing for flooding by adding a few drops of water at a time until the icing reaches a thin consistency. Test by spooning some icing and letting drizzle back in the bowl. You can fill a squeeze bottle with the thinned icing or fill a pastry bag and snip a small hole with scissors. Drizzle the icing inside the outline of your cookie. The icing should begin to fill in the cookie. Use a toothpick to gently distribute the icing until the cookie is “flooded” with the icing. Let icing cool before decorating.
Decorate cookies by piping icing with icing tips or using edible images. Find edible images to purchase here.